Herald in the Holidays with Handmade Ornaments
Brooke Cleaver December 12, 2022
The holiday season is fast approaching, which means it's time to start decorating for the season. However, before you battle the cold and race to the store to replenish your holiday arsenal, consider customizing your space with handmade ornaments and décor. Form new memories and enhance your holiday experience with personalized pieces crafted by you and your loved ones. Follow along to learn how to build three easy crafts.
Mini Holiday Wreaths
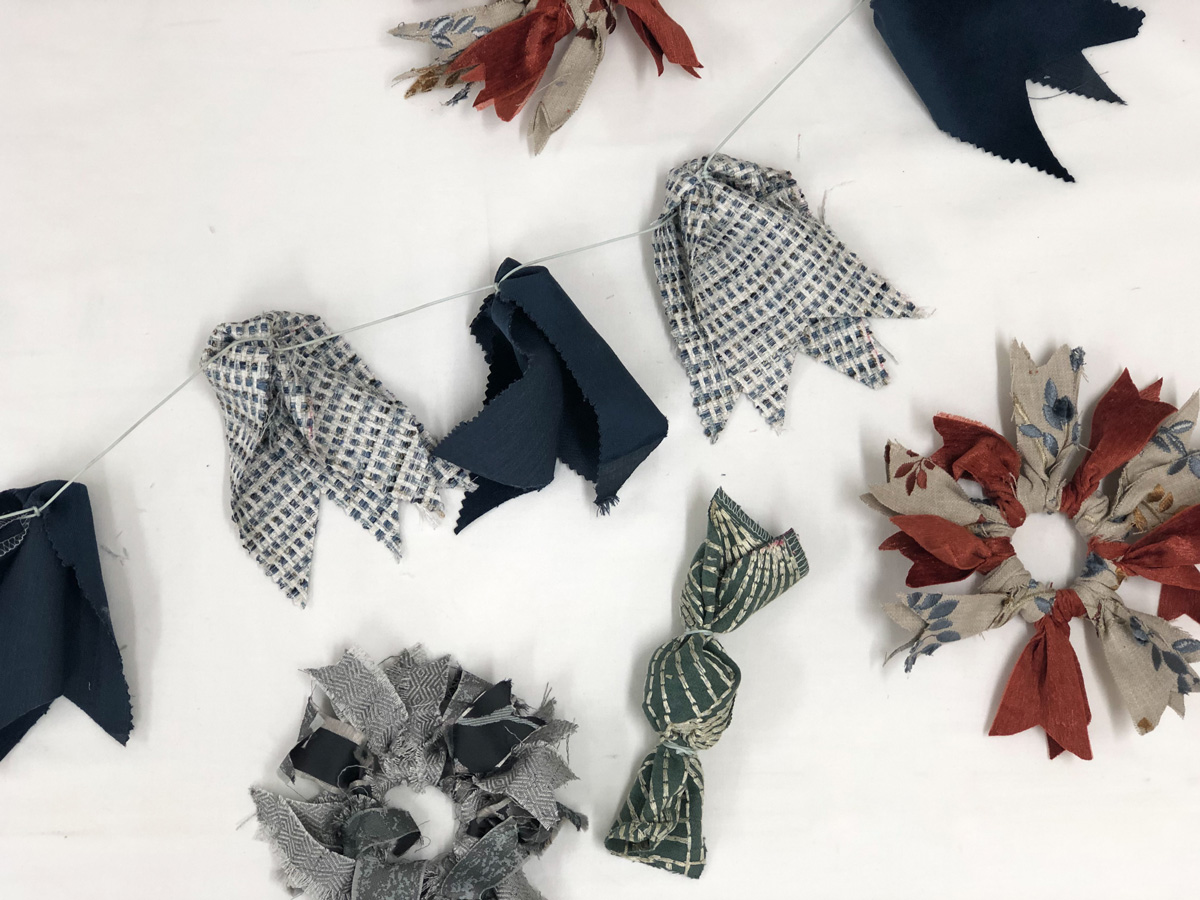
Quaint and charming, handcrafted wreaths are one of the easiest ways to introduce holiday cheer into your home. Whether you enjoy traditional reds and greens or pops of silver and gold, these miniature jewels can be made to correspond with any color scheme. Choose a fabric that most closely aligns with your aesthetic, and let your hands do the rest. And the best part? These fabric-based wreaths are relatively cost-effective and easy to make.

List of Supplies
- Fabric scraps
- Ruler
- Scissors
- Cord, ribbon, or twine
- Any small hoop or ring
- Starch spray (optional)
Step-By-Step Instructions
Step 1:
Spray all material with starch spray and let dry. Doing so will help stiffen the fabric and make it more malleable.
Step 2:
Cut your fabric into 9" x 1" strips using a ruler. Once you complete one strip, use it as a guide or template for future strips. Repeat until you have fifteen or more pieces of fabric.
Don't be afraid to mix and match fabric colors. Choose shades that bring you joy and get you in the holiday spirit. For this project, we wanted our wreath to be warm and inviting, so we used a combination of textiles from our Powerhouse Collection: Story Teller, Vineyard and Mermaid, Rouge.
Step 3:
Next, select a strip of fabric and fold it in half widthwise. Place the folded edge of the material under the hoop or ring. Take the non-folded side of your fabric and wrap it around the top of the ring until it meets the folded end. Once the two ends meet, take your non-folded side and loop it through the opening of your folded side. Doing so should create a loose knot. Pull on the fabric to tighten your knot and secure the material in place. Repeat this step until your ring is fully covered. Once complete, you should have a lovely, robust wreath.
Step 4:
Once your wreath is complete, take a strip of fabric and fold it in half lengthwise. Cut across the material at a 45-degree angle - starting at the folded end and cutting towards the outer edge. Doing so should leave you with a V-shaped edge. Repeat this step until your wreath is thoroughly garnished with V-shaped edges.
Step 5:
Snip off any fabric frays. Take a piece of twine, cord, or string and wrap it around the top of your ornament, create a knot, and place your ornament wherever you see fit.
Festive Garland
Deck the halls with pops of color with homemade garland. Fun and simple to make - this festive streamer makes the perfect accent piece. Drape long strands of decorative fabric over your mantel, or draw in guests by hanging it over an archway or doorframe.

List of Supplies
- Cord, string, or rope
- Scissors
- Fabric Scraps
- Ruler
Step-By-Step Instructions
Step 1:
Cut your fabric into 12" x 4" strips using a ruler. Once you complete one strip, use it as a guide or template for future strips. Repeat this process until you have eight or more strips.
Disclaimer: We wanted to cover 48 inches of space, placing a piece of fabric every 6 inches. However, adjust your measurements accordingly if you wish to cover a larger or smaller distance.
Step 2:
Select a piece of fabric and fold it in half, widthwise. Once you've folded your cloth, carefully fold it again lengthwise. Pay attention to the sides of your fabric strip. You'll notice that one side is folded while the other is not. Cut across the material at a 45-degree angle, starting at the folded end and cutting towards the outer edge. Doing so should leave you with a V-shaped tip. Repeat this step until all your fabric strips look the same.
Step 3:
Next, find a sturdy piece of string, cord, or rope and cut it to your desired length. With a ruler, place your first fabric strip approximately 6 inches from the beginning of your line. Fold a strip of fabric over the cord, so it evenly hangs over it.
Next, while keeping your fabric in place, double-knot the cord so your fabric piece bunches at the top. At this point, your fabric strip should stay securely in place. Using your ruler, place the next piece of fabric approximately 6 inches away from the first piece of fabric. Repeat until you've secured all of your fabric strips.
Step 4:
Cut off any excess cord or string and hang your garland for all to see.
Classic Candy
Another way to make your home feel merry and bright is through the use of decorative candies. Elegant and sweet, these classic treats will last for seasons to come. With the help of a few fabric scraps and ping-pong balls, you can dress your tree or line your table with these fabric-based confections in as little as twenty minutes.

List of Supplies
- Scissors
- Ruler
- Ping pong ball
- Fabric scraps
- Cord, string, or yarn
- Hot glue gun or fabric glue
Step-By-Step Instructions
Step 1:
Cut your fabric into 8" x 6" strips. The number of fabric strips for this craft depends on the number of candies needed. So, if you're only planning on making one piece of candy, you'll only need one strip of fabric.
Step 2:
Place a dollop of hot glue on the center of your fabric strip. Then, place your ping pong ball on top of the adhesive. Let the glue dry before moving forward. Once the glue is dry, roll the fabric over your ping-pong ball widthwise. However, before you cover your ping-pong ball completely, place a dollop of glue on the edge of your fabric. Continue rolling until the ping-pong ball is fully concealed.
Step 3:
Once the glue is dry, choose a side and twist the fabric surrounding your ping-pong ball. Once satisfied, take a piece of string, cord, or rope and tie it twice near where you rotated the material. This will secure the fabric in place and help maintain its twisted appearance. Repeat this step on the other side of your ping-pong ball until you are left with a candy-shaped decoration.
Step 4:
Place a dollop of hot glue in the crevices of your twisted fabric – near where your cord is tied. Doing so will further cement the shape of your decoration. Once the glue is dry, trim your cord or string, and voila! Your piece of candy is done!
Let the Crafting Begin!
What crafts are you planning to do this holiday season? Which one of our decorations would you use in your home? We would love to hear from you. Contact us on Facebook, Instagram, or Pinterest to let us know your thoughts.
Lafayette Interior Fashions is a family-owned, to-the-trade manufacturer of blinds, shades, shutters, draperies, and other custom-crafted interior fashion products. To learn more about our products, Find a local dealer near you.


